
Screen printing is a little bit challenging for beginners. In Actual sense, screen printing is ain’t a difficult task at all and you can set up a screen printing area in your home easily. Here you will learn to do screen printing on your own shirt at home with a minimum amount of materials.
The fundamental keynote of silk screen printing is quite simple and also works like a stencil. Rather than removing forms separately, you layer a screen in picture solution, after that reduced a photo out utilizing an intense light. The video clip over strolls you via the procedure, yet allow’s enter into even more information, beginning with the materials you require. Establish a Silk Screen Shop in your house
Action 1: Get Your Supplies
First points initially, you require to obtain your products in order. Below’s what you require:
-Screen and also structure (you can buy these individually at a regional arts shop or buy a structure and also screen such as this one for $14).
-Picture solution and also sensitizer ($ 20).
-A 250 watt light bulb ($ 4).
-Latex hand-wear covers.
-A pitch black space (wardrobes function great).
-A tee.
-Mop ($ 14).
-Silk Screen Fabric Ink ($ 5).
-Little item of cardboard (that can fit inside the shirt).
Action 2: Create Your Image.
For your very first effort, begin with something basic without plenty of slim lines. A basic shape utilizing Photoshop is a simple means to go. You require a strong black picture due to the fact that its only actual objective is to obstruct the light. The picture you select will certainly be shed right into the solution symphonies 4. As soon as you pick a photo, print it out on a printer onto openness paper (if you do not wish to get a box of openness most replicate stores replicate onto an openness for around a buck).
Action 3: Coat the Screen in Emulsion.
The solution is available in 2 components: the sensitizer as well as the solution. Mix them with each other according to the instructions on the container. Put down your screen on a trash can. Put a little of
The solution mix on the screen and also spread it out on the screen with the squeegee. The solution needs to cover a somewhat bigger location than the picture you intend to publish. If you require to, repeat the procedure up until the screen is covered and also you can not translucent it. You desire a slim, also layer throughout the entire screen. Leave the screen in a pitch black space for 2 hrs till it’s totally dry.
Action 4: Expose the Image on the Screen.
It’s time to reveal the screen to the light. Because very same pitch black area (do not switch on the light yet), set a black fabric or board. Put down the screen as well as framework with the screen side down on top of the black surface area. After that lay the openness with your picture on it on the screen where the picture solution is. Tape the transparency down with scotch tape or lay an item of glass over it.
Relocate your light so it’s concerning one to 2 feet over from the screen. Angle a light with the 250 watt light bulb at the openness with your picture on it as well as leave the area. A work desk light functions best for this, however, if you do not have one, develop a reflector out of tin aluminium foil and also location it over the light to show the light down. Do not switch on any type of various other lights. Wait on concerning 10-15 mins. Go back to space and also meticulously bring up the openness. You must see pale blue lines where the picture is shed right into the screen. If it looks excellent, it’s time to cleanse it off. Otherwise, leave it a couple of even more mins as well as inspect back. Too much exposure will certainly make the picture haemorrhage, so beware.
Action 5: Clean the Screen.
Splash your screen down with cool water from a pipe, sink, or shower head. Notification just how the area where your picture is begins to exfoliate? Proceed to splash it up until you can translucent your picture plainly. Hold the screen as much as the light to ensure it looks precisely like your openness. Allow the screen completely dry. Once it’s completely dry, cover any kind of revealed components of the screen (where there is no image solution or your picture) with tape.
Action 6: Print!
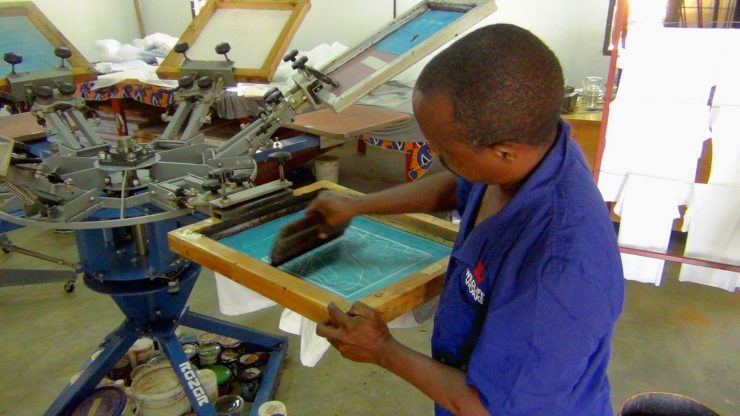
Lay your shirt out on a level surface area. Things a square item of cardboard inside the shirt beneath the location you intend to publish on. Lay the screen over the shirt with the style where you wish to publish it.
Put a percentage of ink flat throughout the top of the screen. Take your squeegee and also make one smooth activity down the screen, applying solid stress (if this is your very first time, it’s an excellent concept to attempt this on a scratch pad prior to printing on your shirt). Run the squeegee up, down, left, and also right a pair times to press all the ink with onto the shirt.
Raise the screen up, draw the cardboard out (meticulously), and also you’re done. If you intend to ensure the photo sticks on the shirt for a long period of time, toss the shirt in the stove on 400 level for concerning 30 secs.
Action 7: Clean-up.
Screen printing ink dries out truly fast, so as quickly as you’re done printing t-shirts, clean the ink off the screen so you can utilize it once again in the future. If you wish to publish an entirely various photo, you can utilize a solution eliminator such as this to clean the screen tidy so you can recycle the textile as well as framework.
Read More: Screen printing machines for small business