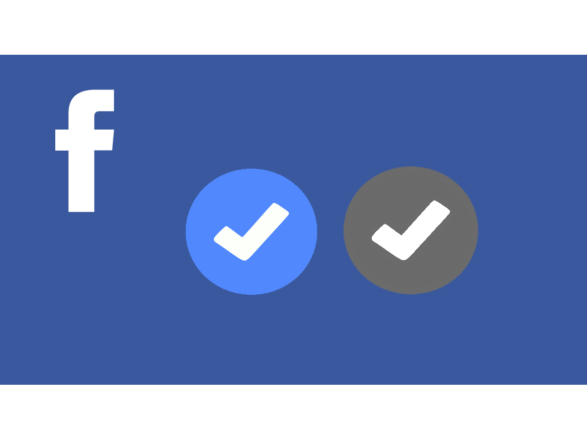
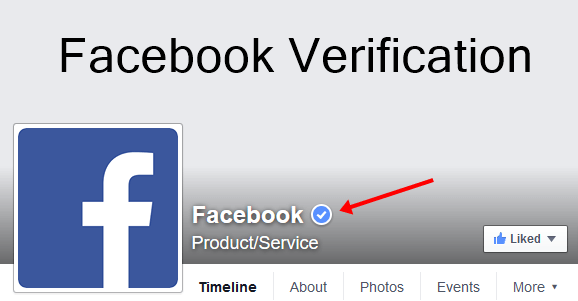
The coveted verified badge appears next to the name of a Facebook page or account name in search and on the profile. It indicates that Facebook has confirmed that an account is the genuine presence of a public figure, celebrity, or global brand it represents.
Whether you have a personal profile or a page, getting the verified badge on Facebook is easy. Having this tiny symbol next to your name makes you more established and credible. You may be wondering about the requirements to get your page or profile verified. Do you need a lot of followers? No. All you have to do is prove that your brand is worthy of the blue badge.
Follow the steps below and earn that highly sought-after verification badge next to your name!
How to Get the Blue Badge for Your Personal Page or Profile
Facebook established the following four requirements to qualify for the verification badge:
- Authentic:
Your account must represent a real person, registered business or entity. - Unique:
Your account must be the unique presence of the person or business it represents. Only one account per person or business may be verified, with exceptions for language-specific accounts. They don’t verify general interest accounts (example: Puppy Memes). - Complete:
Your account must be active and have an about section, profile photo, and at least one post. - Notable:
Your account must represent a well-known, often searched person, brand or entity. They review accounts that are featured in multiple news sources, and they don’t consider paid or promotional content as sources for review.
While most accounts have no problem meeting the first three requirements, the fourth one is notoriously the most difficult to achieve. Nevertheless, there are steps you can take to ensure that your profile or page meets all the requisites for verification.
How to Ensure That Your Facebook Page Meets All the Criteria for Verification
To improve your chances of getting verified, follow these simple tips:
- Always post engaging content with high-quality images on your timeline. You can also run ads to boost increasing Facebook engagement posts.
- Link your profile or page to your official website. This step is optional, but it makes your account appear more credible.
- Add relevant details on the About section of your page. By doing this, you give your visitors an idea of your brand or business. Include your address, contact number, awards, and more. You can also add the link to your website in this section.
- If you want your Facebook profile to be verified, make it public by default so people can follow it. Make sure you have at least a few hundred followers before requesting a verification badge.
- To meet the fourth qualification, try to get the press to write about you and have your brand covered on all major media such as television, print, and web.
Steps and Link to Request Facebook Verification
After ensuring that your profile is ready for verification, the next step is to send a request for the blue badge.
- Visit the official link to request a verification badge.
- Select whether you are requesting verification for your personal profile or a page.
- For a page, select the page you want to get verified from the dropdown menu. For a personal profile, provide the link to your profile.
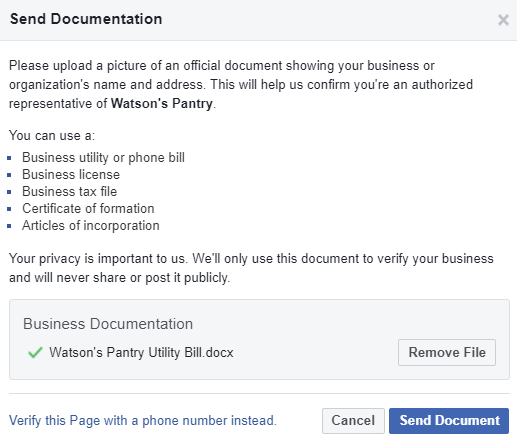
Image Credit : wikihow - span style=”font-weight: 400;”>If you are requesting verification for a page, attach documents of incorporation and a utility bill. For a personal profile, attach a government-issued ID such as a passport or a driver’s license.
- In the Additional Information section, introduce your brand and write a persuasive reason as to why you should be verified. Include your official website and links to press releases about you. Try to keep it short and easy on the eye.
- Hit send and wait around 3-45 days for a response from Facebook.
How to Get the Grey Badge for Your Business Page
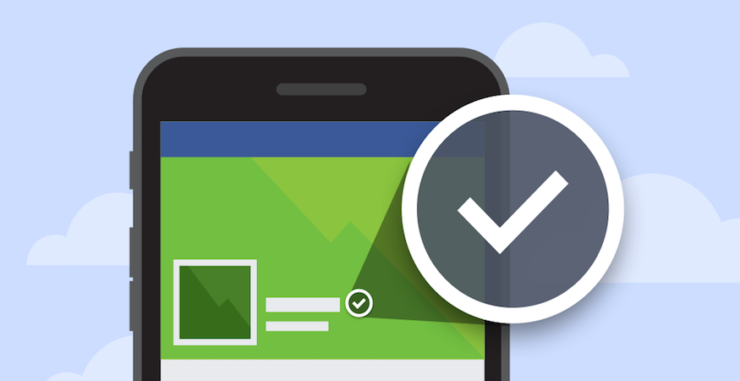
“Based on feedback, we’re removing the gray badge and focusing on other ways for businesses to show their authenticity on Facebook,” stated a spokesperson from Facebook.
The grey badged was used to indicate a particular store location. For example, the official page of a specific business had a blue badge, while one of its store locations had a grey badge.
Nevertheless, businesses can still undergo the verification process. Facebook will first attempt to auto-verify your business by locating it along with the legal business name, business address, and business phone number or business email domain. You will be asked to confirm your association through an automated message with a verification code to either your phone number or email address.
If Facebook is unable to auto-verify your business, you will be asked to submit documentation proving your legal business name and other details.
Steps to Start the Business Verification Process
The steps to verifying your business are just as straightforward as the procedure for verifying a personal page or profile.
- Go to Business Settings.
- Click Security Center.
- Find the Verification section and below Business Verification, click Start Verification.
NOTE: The Start Verification button will be grayed out unless your business needs access to certain features.
Once you’ve started the verification process, you can check your verification status in this section.
- Enter your business details and click Next.
- Select the correct business from the list of suggestions or select None of these matches if your business is not displayed.
- Follow the prompts on your screen to confirm your business details. If you select None of these, you’ll need to verify by submitting additional documentation.
- Decide how you’d like to receive your verification code and choose to Call Me Now or Send Email. Depending on your location, you may not have the option for verification via phone. You’ll need to use the email option.
- Enter your verification code.
Once you receive confirmation that your business is verified, you’re all set!
How to Upload the Required Documents for Business Verification
If Facebook fails to auto-verify your business, you may be asked to submit a few documents for confirmation purposes.
- Go to Business Settings.
- Click Security Center.
- Find the Verification section and below Business Verification section, and click Continue.
- Follow the prompts on your screen to select your business.
- Select None of these matches.
- Upload a standard official document that matches the legal business name you previously entered and click Next.
- Upload a document showing the legal name of your business along with the mailing address or phone number you entered and click Next.
- Decide how you’d like to receive your verification code and choose to Call Me Now or Send Email. Depending on your location, you may not have the option for verification via phone. You’ll need to use the email option.
- Enter your verification code.
- Monitor your Business Verification Status in Security Center.
Once you receive confirmation that you have submitted the requested documents, keep an eye on your verification status. You should hear back from Facebook within five business days or sooner.
A Helpful Trick to Get Verified Using Facebook Ads Manager
If you are spending a considerable amount of money on Facebook Ads (over $50,000 per month), you can try to reach out to Facebook through your assigned Ad Account Representative. They can submit a verification request on your behalf to improve your chances of approval.
What are the Benefits of Having a Verified Profile or Page? Is It Worth It?
Aside from being an instant ego boost, there a few benefits to having the verification badge next to your name, especially if you are running a business.
- It enhances the credibility of your business or personal brand. When users visit your page or profile, they will know that they are interacting with a legitimate account.
- Potential clients will feel more secure when visiting your page or profile.
- Your page or profile will rank higher on Facebook’s Graph Search and even on Google’s search results.
If you’re asking for my opinion on whether going through the process to get a badge is worth it, I’d say it isn’t. Other than the benefits mentioned above, you’re better off spending your time and money on different ways to boost your social media presence.
How Much Time Does it Take for Facebook to Review Verification Requests?
To acquire the blue verification badge for a personal page or profile, you can expect the process to be completed within 3-45 days. For business verification, you can expect a response from Facebook less than five days after you submit all the requirements.
A Few Reasons Why Facebook Rejects Verification Requests
- You don’t have enough press exposure to qualify for the fourth requirement (notability).
- Your reason for verification was not compelling enough.
- The ID you submitted was blurry or not valid.
- You don’t have enough native content on Facebook.
If your request for verification got rejected, you can re-apply after 30 days.
Badge
As stated in the earlier portions of this post, Facebook has removed the gray verification badge to avoid confusion among users.
Who Gets the Blue Verification Check and Who Gets Grey?
The grey badged was used to indicate a particular store location. For example, the official page of a specific business had a blue badge, while one of its store locations had a grey badge.
Last Words
That wraps up everything you need to know about the Facebook verification process. Having the badge next to your name is a huge step towards boosting your social media presence. Follow all the steps mentioned in this post, and you should enjoy the benefits of being verified.
If your page or profile is still not verified after a request, you aren’t really missing too much. You can always take a different approach to improve your social media presence and reach a wider audience.
Author Bio
Hayk Saakian is an entrepreneur who has a keen interest in everything tech-related. He can usually be found writing informative articles at hayksaakian.com, in which he shares valuable insights in today’s modern trends.
Elvitegravir: (Major) In vivo studies suggest eslicarbazepine is an inducer of CYP3A4. The immunogenicity data of etanercept beyond 120 weeks of exposure are unknown. This is thought to result from innate immune production of proinflammatory cytokines https://www.onlinepharmacyinuae.com/. Articadent – Clinical Pharmacology Mechanism of Action Articaine HCl is an amide local anesthetic.

